honeywell th8320u1008 installation manual pdf

Honeywell TH8320U1008 Installation Manual PDF: Article Plan
This article details the Honeywell TH8320U1008’s installation, programming, and troubleshooting, referencing available PDF manuals and online guides for comprehensive user assistance.
Resources include ManualsLib, thermostat.guide, and direct PDF links offering multilingual support (English, French, Spanish) for easy navigation.
The plan covers everything from initial setup to resolving common issues, ensuring a smooth experience with this touchscreen programmable thermostat.
The Honeywell TH8320U1008 is a popular touchscreen programmable thermostat, known for its user-friendly interface and advanced features. This thermostat, part of the VisionPro 8000 series, offers precise temperature control and energy-saving scheduling options. Finding the correct installation manual PDF is crucial for a successful setup.
Numerous online resources provide access to these manuals, including ManualsLib and direct links from sites like Expert QA and supplyhouse.com. These PDFs cover installation instructions, programming guides, and troubleshooting tips. The availability of multilingual versions – English, French, and Spanish – broadens accessibility.
Understanding the thermostat’s capabilities requires reviewing the operating manual, which details functions like setting temperature schedules, utilizing hold functions, and adjusting the real-time clock. Proper installation, guided by the PDF, ensures optimal performance and longevity of the TH8320U1008.
Understanding the Honeywell VisionPro 8000 Series
The Honeywell VisionPro 8000 series represents a significant advancement in home comfort control, offering a range of programmable thermostats designed for efficiency and ease of use. The TH8320U1008 is a key model within this series, distinguished by its intuitive touchscreen interface and comprehensive features.
Accessing the correct installation manual PDF is vital for understanding the series’ common wiring configurations and programming logic. Resources like ManualsLib and thermostat.guide provide detailed documentation specifically for the VisionPro 8000 line. These manuals often share similar installation principles, making cross-referencing helpful.
The series emphasizes user customization, allowing homeowners to tailor settings to their specific needs. The TH8320U1008’s manual PDF will detail these options, ensuring users can maximize energy savings and comfort within the VisionPro 8000 ecosystem.
Package Contents and Initial Inspection
Upon receiving your Honeywell TH8320U1008, carefully inspect the package for any signs of damage during shipping. The complete package, as detailed in the installation manual PDF, should include the thermostat unit itself, a mounting base plate, screws, wire labels, and the comprehensive installation/user guide.
Referencing the PDF manual’s parts list is crucial to confirm all components are present. Missing parts can delay installation. Note any discrepancies immediately and contact the retailer or Honeywell support.
Before proceeding, visually inspect the thermostat for any physical defects. Ensure the touchscreen is undamaged and the connections appear secure. A thorough initial inspection, guided by the PDF, prevents potential issues later.
Safety Precautions Before Installation
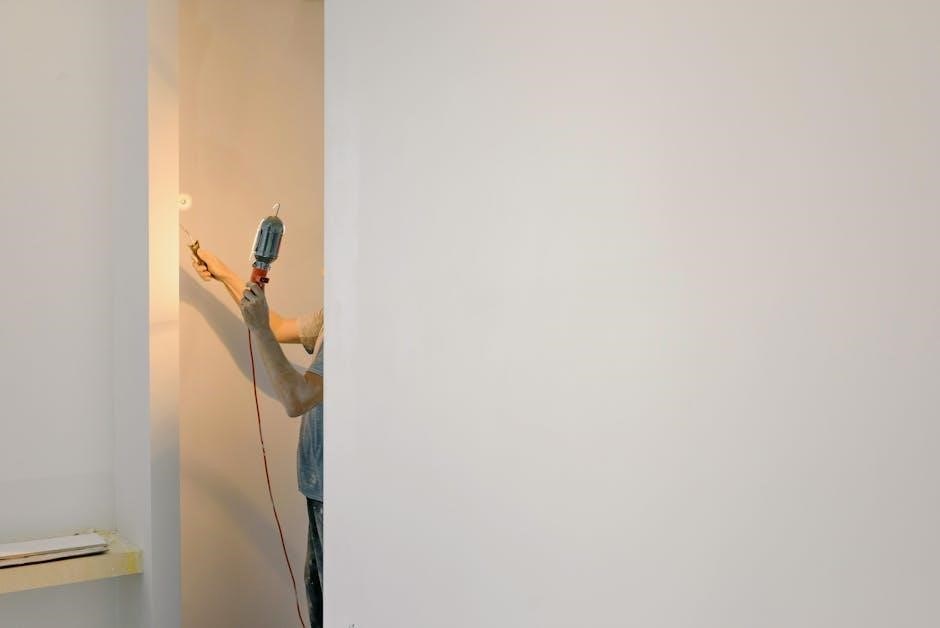
Prior to installing your Honeywell TH8320U1008, always disconnect power to your HVAC system at the breaker box. This is a critical safety step detailed in the installation manual PDF to prevent electrical shock. Never work with live wires.
The PDF manual emphasizes the importance of understanding your system’s wiring before beginning. If you are uncomfortable working with electrical wiring, consult a qualified HVAC technician. Improper wiring can damage the thermostat or your HVAC equipment.
Exercise caution when handling tools and ensure a stable work environment. Keep the installation area clear of obstructions. Review all safety warnings within the Honeywell TH8320U1008 PDF guide before commencing installation.
Required Tools and Materials
Successfully installing the Honeywell TH8320U1008 necessitates a few essential tools. The installation manual PDF recommends a small screwdriver – both flathead and Phillips head – for terminal connections and mounting. A wire stripper is crucial for preparing the existing thermostat wires for connection to the new base plate.
You’ll also need a level to ensure the thermostat is mounted straight, contributing to accurate temperature readings. A pencil is helpful for marking screw locations. The PDF suggests having a digital multimeter available for testing wire voltages, though it’s optional.
Regarding materials, ensure you have appropriate screws and wall anchors if replacing an older thermostat with different mounting holes. The thermostat package itself contains the base plate and the TH8320U1008 unit.
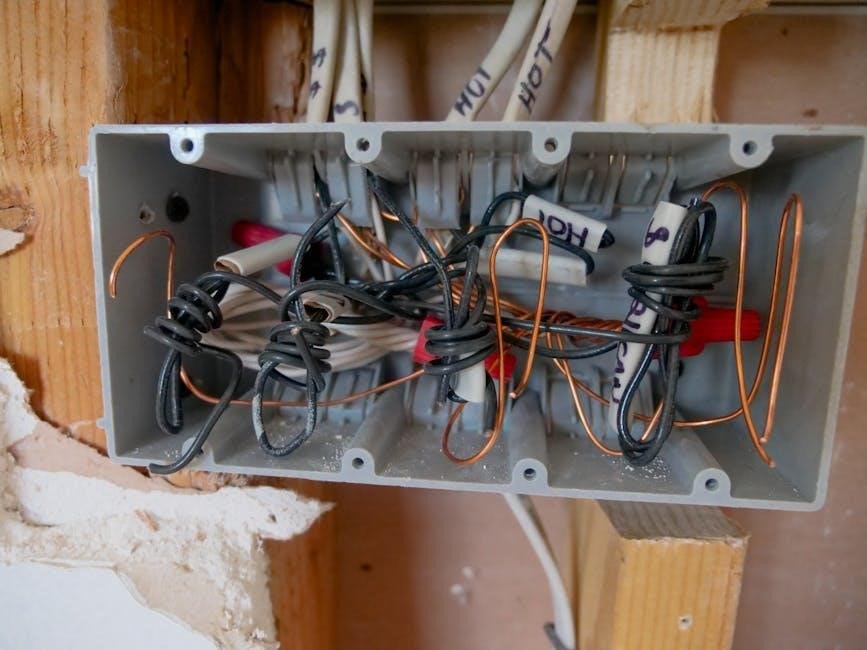
Wiring Diagram Overview
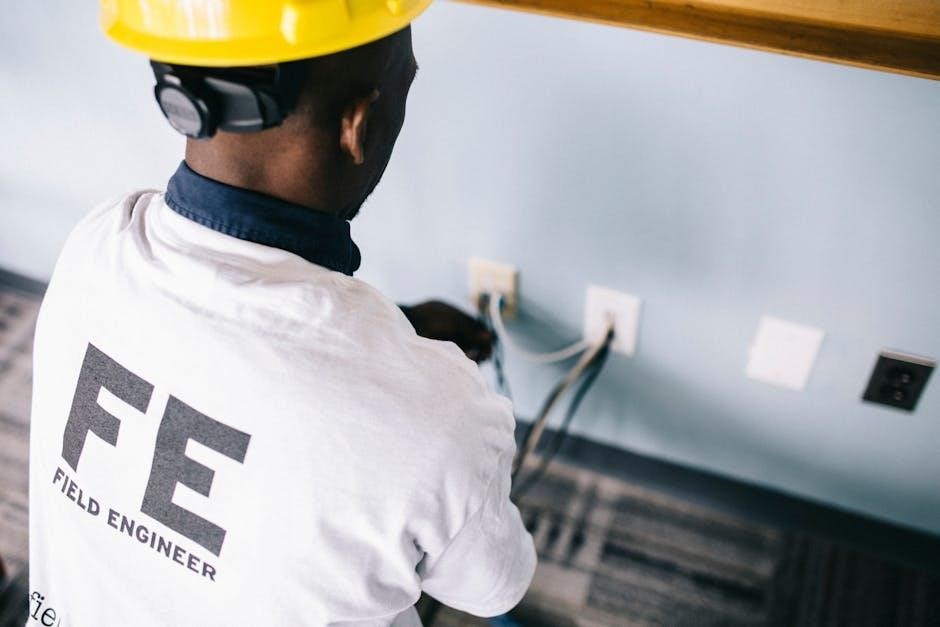
The Honeywell TH8320U1008’s wiring diagram, readily available in the installation manual PDF, is critical for correct installation. It illustrates terminal designations for common HVAC systems – heating, cooling, and fan control. Key terminals include Rh and Rc (power), W (heat), Y (cool), and G (fan).
Understanding the diagram is vital as wiring configurations vary based on your system type (conventional or heat pump). The PDF clearly depicts wiring for single-stage, multi-stage, and heat pump systems. Pay close attention to the ‘C’ terminal (common wire), often required for consistent power.
Incorrect wiring can damage the thermostat or your HVAC equipment. The manual emphasizes careful wire identification and secure connections. Refer to the diagram frequently during the wiring process to ensure accuracy and a functional system.
Step-by-Step Installation Guide
The Honeywell TH8320U1008 installation, detailed in the downloadable PDF manual, begins with safety precautions – always turn off power at the breaker. Step one involves removing your old thermostat and carefully labeling each wire before disconnecting.
Next, mount the TH8320U1008 base plate to the wall, ensuring it’s level. The manual provides clear instructions for wire connections, referencing the wiring diagram. Securely attach each wire to the corresponding terminal.
After wiring, snap the thermostat onto the base plate and restore power. The guide then walks you through setting the real-time clock and initial system configuration. Follow each step meticulously for a successful installation and optimal performance.
Removing the Old Thermostat
Before installing the Honeywell TH8320U1008, the PDF manual stresses the importance of safely removing your existing thermostat. Crucially, switch off the power to your HVAC system at the circuit breaker to prevent electrical shock.
Carefully remove the thermostat cover, exposing the wiring terminals. Before disconnecting any wires, meticulously label each one with its corresponding terminal designation. This is vital for correct reconnection.
Take a photograph of the wiring as a backup reference. Gently disconnect each wire, and remove the old base plate from the wall. Ensure the wall surface is clean and prepared for the new TH8320U1008 base plate installation.
Connecting the Wires
Referring to the wiring diagram in the Honeywell TH8320U1008 installation PDF, carefully connect the labeled wires to the corresponding terminals on the thermostat’s base plate. Double-check each connection against your pre-installation photograph and labels to avoid errors.
Ensure wires are securely fastened to the terminals; loose connections can cause system malfunctions. The manual highlights common terminal designations like Rh, Rc, W, Y, and G. Pay close attention to the ‘C’ wire (common wire), often required for powering the thermostat.
If a ‘C’ wire isn’t present, consult the manual for potential workarounds or adapter solutions. Gently tuck any excess wire back into the wall opening, avoiding pinching or damage.
Mounting the TH8320U1008 Base Plate
After wiring, carefully align the TH8320U1008 base plate with the mounting holes on the wall, ensuring it’s level for optimal display. Utilize the provided screws and wall anchors (if necessary) to securely fasten the base plate to the wall. Avoid over-tightening the screws, which could damage the plate or wall.
The installation PDF emphasizes a snug fit to prevent wobbling or detachment. Verify the base plate is firmly attached before proceeding. Ensure no wires are pinched or strained during the mounting process.
A properly mounted base plate is crucial for the thermostat’s stability and long-term performance. Double-check alignment before fully securing it.
Adjusting the Real-Time Clock
Upon powering up the TH8320U1008, the thermostat will likely prompt you to set the current date and time. Access the clock settings through the thermostat’s menu, typically found under “Settings” or “System.” Use the touchscreen interface to navigate and adjust the hour, minute, and year.
The installation guides highlight the importance of accurate timekeeping for scheduling functions. Confirm the correct time zone is selected for automated daylight saving time adjustments. Refer to the user manual PDF for detailed, step-by-step instructions specific to your model.
Accurate time ensures your heating and cooling schedules operate as intended, maximizing energy savings and comfort.
Basic Operation and Navigation

The Honeywell TH8320U1008 features a user-friendly touchscreen interface for intuitive control. The main screen displays the current temperature, setpoint, and operating mode (Heat, Cool, Auto, Off). Swipe or tap to access different menus and settings.
Common functions like temperature adjustment, mode selection, and fan control are readily available. The “Menu” button provides access to advanced settings, scheduling options, and system information. Consult the user manual PDF for a detailed explanation of each icon and function.
Familiarize yourself with the touchscreen gestures for seamless navigation and efficient thermostat operation.
Programming the Thermostat
The Honeywell TH8320U1008 allows for customized temperature scheduling to optimize comfort and energy savings. Access the programming menu through the touchscreen interface, typically found under the “Menu” or “Schedule” options. You can create different schedules for weekdays, weekends, or individual days.
Set specific temperatures for various time periods – wake, leave, return, and sleep – to match your daily routine. The user manual PDF provides step-by-step instructions and visual aids for creating and modifying schedules. Explore features like Smart Response to learn your heating/cooling patterns.
Programming ensures efficient climate control and reduced energy consumption.
Setting Temperature Schedules
The Honeywell TH8320U1008 excels in customizable temperature scheduling, enhancing comfort and minimizing energy waste. Utilize the touchscreen to access the scheduling function, often located within the main menu. Create distinct schedules tailored to your lifestyle – weekdays, weekends, or even unique daily plans.
Define temperature setpoints for specific time blocks: wake, leave, return, and sleep. The downloadable PDF manual offers detailed guidance, including screenshots, for schedule creation and modification. Consider utilizing the “Hold” function for temporary overrides. Smart features adapt to your preferences over time.
Effective scheduling maximizes efficiency and lowers utility bills.
Utilizing Hold Functions
The Honeywell TH8320U1008 provides versatile “Hold” functions for temporary temperature adjustments, overriding programmed schedules. A temporary hold maintains a set temperature for a specified duration, reverting to the schedule afterward. Permanent holds disable the schedule entirely, requiring manual reactivation.
Access these options directly through the thermostat’s touchscreen interface. The user manual PDF details each hold type and its activation process. Utilize holds for unexpected events, like guests or schedule changes. Carefully consider the hold duration to avoid energy waste.
Understanding hold functions allows for flexible temperature control and personalized comfort.
System Checkout and Testing
After installation, thorough system checkout is crucial for verifying proper operation of the Honeywell TH8320U1008. The installation guides emphasize testing both heating and cooling modes. Confirm the thermostat accurately calls for heat and cool from your HVAC system.
Observe each function – fan operation, temperature adjustments, and scheduled programs – to ensure responsiveness. Refer to the troubleshooting section within the user manual PDF for common issues. Verify correct wiring connections if problems arise.
A complete system test guarantees optimal performance and energy efficiency; Document any discrepancies for future reference or professional assistance.
Troubleshooting Common Issues
The Honeywell TH8320U1008 manual PDF details solutions for frequent problems. Common issues include “No Power,” often linked to wiring or breaker trips. Incorrect temperature readings may indicate sensor malfunction or improper calibration – consult the manual for adjustment procedures.
If the thermostat isn’t responding, try resetting it (see dedicated section). Wiring errors are a frequent cause of operational failures; double-check connections against the wiring diagram. Refer to online resources like thermostat.guide for additional support.
The manual’s troubleshooting table provides a systematic approach to diagnosing and resolving issues, ensuring optimal performance.
No Power to the Thermostat
If your Honeywell TH8320U1008 displays no power, the installation manual PDF recommends several checks. First, verify the circuit breaker controlling the HVAC system hasn’t tripped. Next, inspect the wiring connections at the thermostat baseplate, ensuring they are secure and correctly placed according to the wiring diagram.
Confirm the ‘C’ wire (common wire) is properly connected, as this is essential for powering the thermostat. A loose or missing ‘C’ wire is a common cause of power failure. Consult the manual’s troubleshooting section for specific wiring configurations.
If issues persist, a faulty transformer might be the culprit – professional HVAC assistance may be required.
Incorrect Temperature Readings
If the Honeywell TH8320U1008 displays inaccurate temperatures, the installation manual PDF suggests several troubleshooting steps. First, ensure the thermostat isn’t exposed to direct sunlight, drafts, or heat-generating appliances, as these can skew readings. Verify proper airflow around the thermostat; obstructions can cause inaccurate sensing.
Check the thermostat’s location – it shouldn’t be near exterior walls or doors. The manual details calibration options; you may be able to adjust the temperature offset within the settings menu. If the problem continues, a faulty temperature sensor might be the issue.
Consult the PDF for advanced diagnostics or consider professional HVAC support.
Resetting the Honeywell TH8320U1008
The Honeywell TH8320U1008 installation manual PDF outlines reset procedures for various scenarios. A soft reset, often achieved by cycling the power (turning off the breaker), can resolve minor glitches. For more significant issues, a factory reset might be necessary, returning the thermostat to its original settings.
The manual details the specific button combinations or menu options required for a factory reset – carefully follow these instructions to avoid unintended consequences. Remember that a factory reset will erase all programmed schedules and preferences, requiring re-configuration.
Before resetting, consider documenting your current settings. Refer to the PDF for detailed step-by-step guidance and warnings;
Accessing the User Manual PDF
The Honeywell TH8320U1008 user manual in PDF format is readily available online, offering a comprehensive resource for installation, operation, and troubleshooting. Several websites host the document, including Honeywell’s support pages and third-party resources like ManualsLib and SupplyHouse.com.
A direct link frequently cited is https://s3.amazonaws.com/s3.supplyhouse.com/product_files/TH8320U1008-User.pdf. This PDF provides detailed instructions, wiring diagrams, and explanations of the thermostat’s features.
Downloading the PDF allows offline access to the manual, proving invaluable during installation or when internet connectivity is limited. Ensure you download from a reputable source to avoid potentially corrupted files.
Language Options in the User Manual (English, French, Spanish)
The Honeywell TH8320U1008 user manual demonstrates a commitment to accessibility by offering documentation in multiple languages. Primarily, the manual is available in English, providing detailed instructions for the majority of users.
Recognizing a diverse user base, Honeywell also provides versions in French and Spanish. This multilingual support ensures that individuals comfortable in these languages can easily understand the installation, programming, and troubleshooting procedures.
The availability of these language options simplifies the setup process for a wider audience. Users can select the manual corresponding to their preferred language, enhancing comprehension and reducing potential errors during installation and operation.
Where to Find Additional Support and Resources
Beyond the official Honeywell TH8320U1008 installation manual PDF, several online resources offer supplementary support. Websites like ManualsLib host multiple versions of the manual and related documentation, providing a centralized location for information.
Thermostat.guide offers detailed installation instructions and a breakdown of the thermostat’s features. Expert QA provides links directly to the user manual hosted on Amazon S3, ensuring access to the latest version.
For further assistance, Honeywell’s official website is a valuable resource. Additionally, online forums and communities dedicated to home automation often feature discussions and troubleshooting tips specific to the TH8320U1008, fostering peer-to-peer support.


Leave a Reply
You must be logged in to post a comment.